

How To Set Up A Ring Doorbell
How to Install the Ring Video Doorbell 2
You bought a Ring Doorbell but don't know how to set it up? Follow the steps below to install your Ring Video Doorbell 2 in less than an hour.
Every editorial product is independently selected, though we may be compensated or receive an affiliate commission if you buy something through our links. Ratings and prices are accurate and items are in stock as of time of publication.
Introduction
Ring's Video Doorbell 2 is an incredible product. It will bring a sense of security that not many products on the market can. Installing the Ring Video Doorbell 2 is not difficult, but can feel daunting when you first open the box. It comes with a bunch of different screws, anchors, mounting plates and you don't know what to do with them. Follow the process below for step-by-step instructions to install the Ring Video Doorbell 2.
Project step-by-step (7)
Step 1
Charge the Battery
The Ring Video Doorbell 2 is able to be hardwired into your previous doorbell system (Ring includes all the necessary tools and materials to do so) or be used with a battery. The battery does not come charged and either way you decide to mount the Doorbell 2, you will need to charge the battery.
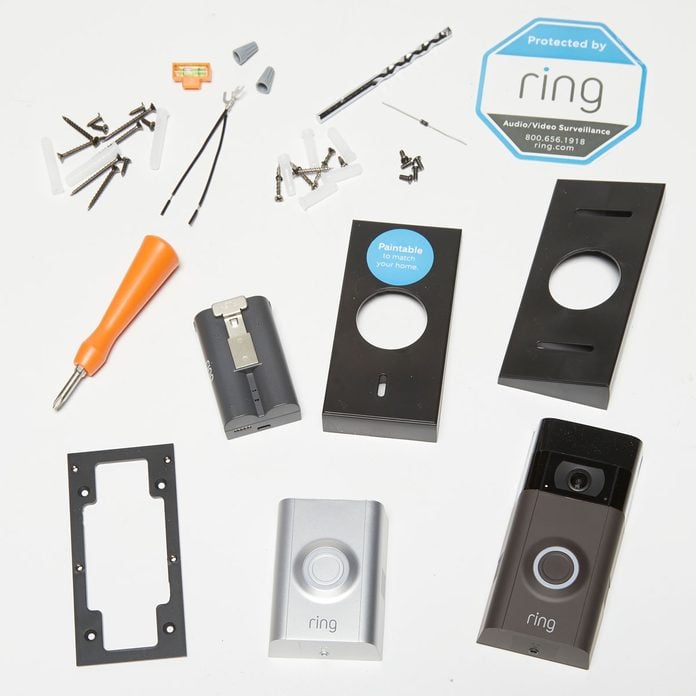
The above photo shows everything that comes in the Ring Video Doorbell 2 box. Ring gives you all tools and materials you need to mount the Doorbell 2, even if you mount to brick or concrete.
Step 2
Download the Ring—Always Home App
Download the Ring—Always Home app to your smart phone, available on iOS and Android devices. It is where you set up and install devices, control the settings and group devices together.
You can scroll down the store page and find two more apps, Neighbors by Ring and Rapid Ring. Both of these apps are responses to problems with the Always Home app. The Neighbors app gives a quick look into crime on your surrounding area and the Rapid app allows you to access your camera's live view faster than the flagship application.
Sign Up For Our Newsletter
Complete DIY projects like a pro! Sign up for our newsletter!
Do It Right, Do It Yourself!
![]()
Step 3
Create Your Ring Account
After downloading the Ring – Always Home app, you will need to create an account. This process is similar to most other accounts you have but with a couple key differences.
First, you will input your address. Doing this will tell the app what crimes to report to you. You won't want to see every suspected package thief within a 30-mile radius, you probably only want to know in your neighborhood.
Second, you will be pre-enrolled for a 30-day free trial of Ring's protection plan. A lot of the functionality of Ring products comes from the protection plan. Once that trial runs out, you may question why you purchased the Video Doorbell 2 in the first place.
Step 4
Set Up the Device Through the Ring—Always Home App
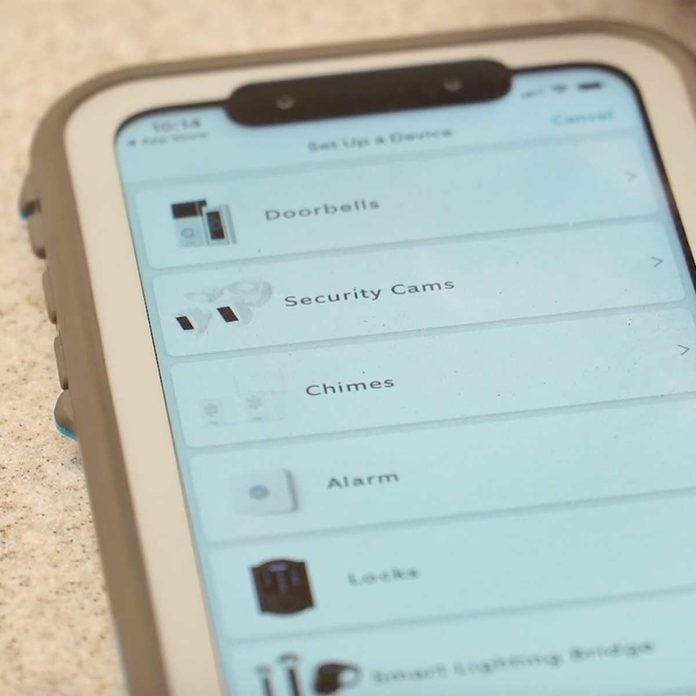
Once you are done creating your account, you can begin installing the Ring Video Doorbell 2. On the Ring app dashboard, select Set Up a Device > Doorbells. A prompt will come up to scan the QR code. You can find the QR code on the back of the Video Doorbell 2. If the code doesn't work, you can manually input the device.
To manually input the doorbell, take off the front plate and push the button on the top right corner of the device. Next, go to your phone's Wi-Fi settings and select the "Ring-" network.
The Ring – Always Home app will walk you through the rest of the setup process. You will insert the battery, connect the Video Doorbell 2 to your home's Wi-Fi, select how sensitive the motion settings are, tell the app what angle you are mounting the camera at, if you have stairs up to the doorbell, etc. None of this information is set in stone and you can adjust it later if you find the Ring Video Doorbell 2 isn't working how you would like.
Step 5
Test the Video Doorbell 2's Live View

After you get through the setup process, test the live view. Set the Video Doorbell 2 down, open the live view and see if it works, if you get a notification at movement, if the doorbell chimes when you press the center button. If it doesn't you may need to remove the device (Click the three dots in the Camera view > Settings > Device Settings > General Settings > Remove This Device) and reinstall it.
Step 6
Mount the Ring Video Doorbell 2
Now you can finally install the Ring Video Doorbell 2! Set the Ring Video Doorbell 2 in place and mark where the screws go. Drill pilot holes and fasten the Video Doorbell 2 in place.
If you are mounting to brick or concrete, you will need a carbide drill bit. Concrete anchors are included with the Video Doorbell 2. Hammer drills are preferable for drilling into concrete, but a regular drill will work just fine. If you are mounting to wood, you can fasten the Video Doorbell 2 with the included screws.
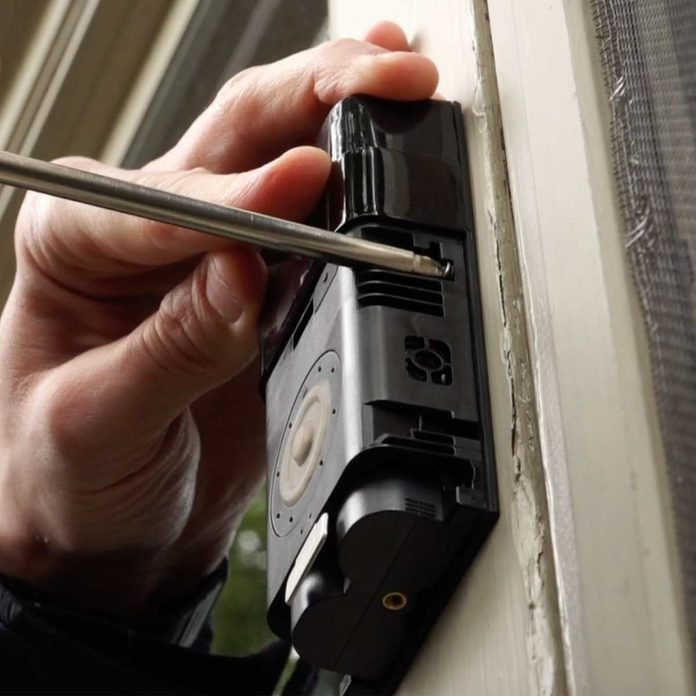
Step 7
Add the Front Plate

After you fasten the Ring Video Doorbell 2 to the exterior of you home, replace the front plate and fasten it to the rest of the Doorbell 2 with the small, hex-head screw that is included in the box.
You can only fasten and remove this screw with the Ring screwdriver. This is a great safety device so people cannot come up to your home and remove the battery to disable the Doorbell 2. Keep the screwdriver in your tool box because you will need it every time you have to recharge the battery.
Next, read our review of the Ring Doorbell 2.
How To Set Up A Ring Doorbell
Source: https://www.familyhandyman.com/project/how-to-install-the-ring-video-doorbell-2/
Posted by: fairchildshoebethe.blogspot.com
0 Response to "How To Set Up A Ring Doorbell"
Post a Comment